 There are SO MANY possibilities and variations to this basic pattern for a reversible bag. I will go through the basics for a bag with finished dimensions approximately 15″ high x 12″ wide, which is a great size for groceries or just toting around stuff. I use a bag this size as a knitting bag (to hold all my supplies for my current project). After the basic pattern, I have added a section on variations and modifications that I have used. I am sure there are endless possibilities though!
Note regarding materials and instructions: since this bag is reversible, the exterior and lining (interior) fabric designations are somewhat arbitrary – but make the instructions more clear. Keep in mind that which ever fabric you choose for each side is just for now but can be flipped when you finish!
Materials
- 1/2 yard fabric for exterior
- 1/2 yard canvas or other fabric for lining
- 1 1/2 yard – 1″ wide webbing for handles OR 1/8 yard fabric and 1/8 yard canvas or interfacing for stabilizing handles
- Thread to match fabric
- Optional:
- 1/2 yard canvas, pellon interfacing, or fleece for interior stabilizing (optional).
- Magnetic snap closure
- Extra fabric (12″ x 6″) for pocket(s)
- Felt or other notions to decorate the bag
Abbreviations
RS: Right side of fabric (the printed side)
WS: Wrong side of fabric (the unprinted side)
Instructions:
-
Cut fabrics
- Exterior (Fabric A) – cut two pieces – 18″ long x 18″ wide
- Lining (Fabric B) – cut two pieces – 18″ long x 18″ wide
- Handles (choose one)
- Cut two pieces of 1″ webbing – 27″ long OR
- For fabric handles:
- Cut two pieces of fabric – 22″ long x 4″ wide
- Cut two pieces of canvas or other stabilizer – 22″ long x 2″ wide
-
Make Exterior
Place two squares of fabric A, RS together, and pin around sides and bottom. Starting at the top of one side and using a 1/2″ seam allowance, sew down side, bottom, and up other side.
With chalk or pencil, mark a 3″ square in each bottom corner. Cut out corners.
Press seams open.


-
Make Exterior Gusset
One one side of the bottom, pinch together the bottom of the side seam with the side of the bottom seam. Make sure the seams are lined up, and pin. Pin raw edges together – this should form a pretty straight line.
Repeat for other side.
Sew along each pinned line with 1/2″ seam allowance.


Finished Exterior with Gussets -
Make Lining
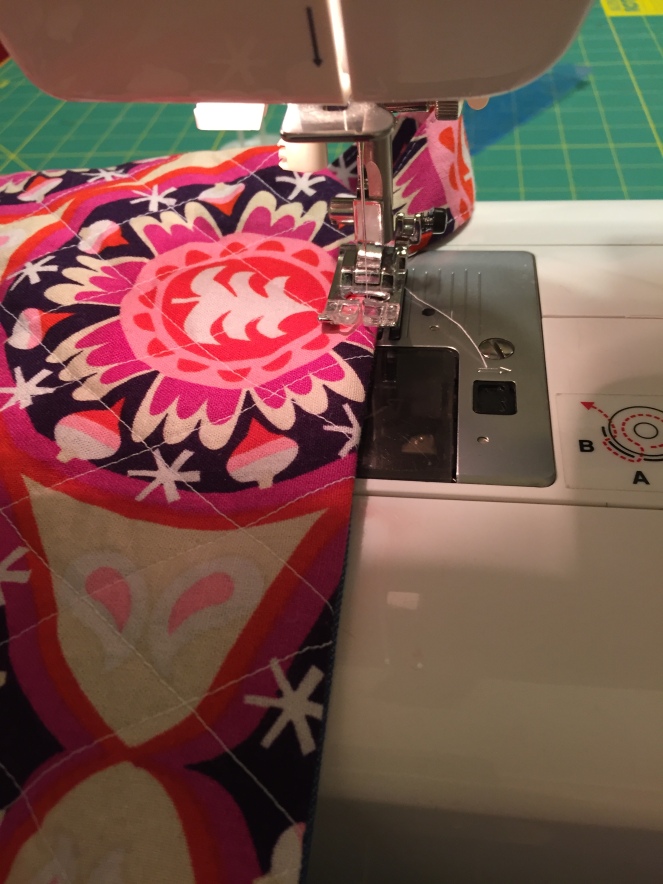
Repeat instructions (above) for Exterior and Exterior Gusset using Fabric B. Note in my pictures, I have added a pellon interfacing layer and quilted the fabric. The pellon/white is on the WS of the lining fabric.


Finished Lining with Gussets -
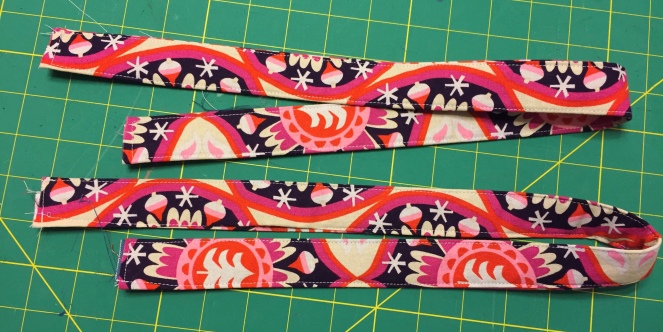
Make Fabric Handles (Optional)
Skip this section if using webbing – go straight to “Attach handles.”
Fold one stabilizer piece (I used denim as a stabilizer since I had extra sitting around) in half lengthwise and press. It doesn’t matter if it is WS or RS together because this will not be showing in the finished handles. Note that these handles are not reversible.
Fold one fabric piece in half lengthwise WS together, and press.
Open fabric piece and lay WS facing up.
Open stabilizer piece and lay on top of fabric piece, centering on creases.

Fold raw edges of fabric over stabilizer to meet in the middle, along crease line. Press. Stabilizer should be covered by fabric on both sides.

Fold fabric/stabilizer piece in half lengthwise along crease and press.

Top stitch along all four sides of strap.
Repeat for second handle.
-
Attach Handles
Turn lining RS out.
Center one handle on the RS of the lining, 4″ from each side, matching raw edges. Be sure handle is not twisted and is bending toward the bag bottom (see picture).
Pin in place. Repeat for other side.
Sew handles onto lining with 1/4″ seam allowance.

Tote Bag Lining with Webbing Handles -
Assemble Bag
Insert lining (RS out) into exterior (WS out) of bag.
Tuck handles between two fabrics so they can’t be seen; WS will be showing both inside and outside of bag.
Line up side seams and pin. Line up raw edges all around top and pin.
Sew around top raw edge with 1/2″ seam allowance, leaving a 5″ opening on one side between handles for turning.

Turn bag RS out through the opening.
Press along top seam all the way around. At opening, press so that fabric is folded to match the seam line. Pin opening closed.
Starting at side seam, topstitch around top edge of bag to close opening.
Variations
Now for the fun!
Variation #1: sizing
This bag could be made in ANY size, but a couple options that I have made:
- Gift, Lunch, or Shoe Bag: perfect size for a smaller gift, carrying your lunch to work, or toting a pair of shoes. (If you live in San Francisco you may walk in one pair and save your heels for the office, if you are in the midwest you are probably wearing your boots to work then changing to dry, inside shoes once you arrive) – finished 9.5″ high x 7″ wide. Modifications: cut 12″ x 12″ fabric pieces and 22″ handles in step #1, and 2.5″ squares in bottom corner for gusset in step #2.
- Wine Bag: finished 12″ high x 4″ wide. Modifications: cut 14.5″ x 9″ fabric pieces and 22″ handles in step #1, and 2.5″ squares in bottom corner for gusset in step #2. I also add fleece interfacing to pad the bag and protect the wine a bit (see the next variation).
Variation #2: canvas, pellon interfacing, or fleece for interior stabilizing
Depending on the weight of your fabrics for the bag as well as the utility of the bag, you may want to add a third layer for stabilization that is sandwiched between exterior and interior layers. Some examples of when I have used this:
- If your exterior and interior fabrics are both lightweight, adding canvas will help reinforce your bag for when you are carrying heavier items.
- Stiff Pellon craft interfacing could be used to make the sides of your bag much more structured.
- As noted above, you can add pellon fleece to pad your bag to protect your wine, or if you want to quilt your bag.
Modifications:
Cut two pieces of canvas or stabilizer that are the same size as your bag – so 18″ x 18″ for the original tote. You will be adding the canvas or other stabilizer to the fabric that you want to reinforce (either exterior or lining). If you have lightweight cotton for both the exterior and lining and just want to add structure to the bag as a whole, then it doesn’t really matter too much which side you reinforce.
If you are stabilizing the fabric on the exterior, add this step to the beginning of step #2; if you are adding to the lining fabric, add this to the beginning of step #4. Pin each canvas or stabilizer square to the WS of the fabric piece, matching raw edges. Proceed with sewing the gussets, but you will have 4 layers of fabric instead of 2 – the canvas or stabilizer will be outward facing with the fabric sandwiched inside RS together.

Variation #3: pockets, closures & applique
All of these variations are made to the exterior or interior fabric pieces before sewing the pieces together and adding the gusset.
- Add one or more pocket to the exterior (fabric A) or interior (fabric B): Cut 12″ x 6″ fabric, press raw edges toward WS 1/2″ around, fold in half with WS together. Sew topstitch across single folded edge. Center pocket on RS of either one piece of fabric A or fabric B with single-folded edge facing up. Pin in place and topstitch along wise and bottom edges to attach.
 Press raw edges toward WS 1/2″ around
 Fold in half with WS together
 Sew topstitch across single folded edge
 Center & attache to RS of fabric
 - Add a magnetic snap to the interior before sewing. Note that this will limit your bags “reversability.” Center the snap on the top edge of the interior fabric, 1 1/2 from top raw edge. Be sure prongs go through interior and any canvas or interfacing you have added.


-

Gift Bag with Felt Tree Applique Add felt (or other applique) decorations to either fabric A or fabric B side. Feel free to use the felt cutout patterns from my earlier post on felt Christmas ornaments as a template. I used the embroidery stitch on my sewing machine to add a name to the felt before the applique process – you could also just use embroidery floss to hand stitch a name or other word. Here is a great post on how to make an applique if you want learn more.

That’s it – I am sure there are tons of other ways to fancy up your bags, and if any readers make this, I would love to see what you come up with.


Here is another bag I made using upholstery fabric and denim.


Great instructions, Sarah. I have made these also, and for a magnetic closure I sewed a very small pocket on each side just below the top. I dropped in a magnet and then stitched the top closed. This way either way on a reversible bag, the magnetic closure will work. The round magnets are about 1″ diameter and come several in a pack.
LikeLiked by 2 people
Great tip! The ‘drop-in’ magnets are also not quite as strong as the others, which can be too strong for lightweight fabrics.
LikeLiked by 1 person
I actually am already considering changing out my snap for magnets because the magnetism is too much in the snaps (especially without reinforcement) and they pull at the fabric – not good for longterm use. Maybe I will post an addendum with how I did this since it may involve some seam ripping! I guess that is why a seam ripper is my most frequently used tool 😉
LikeLike